Bent Knee Abduction Crunch with Arms Through: Form, Benefits & Core Tips
Learn the Bent Knee Abduction Crunch with Arms Through to train abs, core control, and hip stability with proper form, sets, tips, and gear.
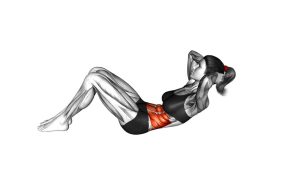
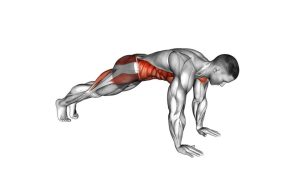
Bent Knee Abduction Crunch with Arms Through
This exercise works best when the movement is slow, compact, and controlled. The goal is not to swing the legs or force the neck forward. Instead, keep the knees lifted, maintain a stable lower back position, and use the abdominal muscles to curl the shoulders upward as the arms reach between the knees.
Quick Overview
| Body Part | Abs |
|---|---|
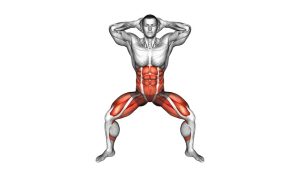
| Primary Muscle | Rectus abdominis |
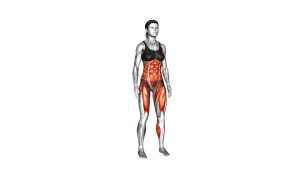
| Secondary Muscle | Hip flexors, transverse abdominis, obliques, adductors, deep core stabilizers |
| Equipment | No equipment required; optional exercise mat |
| Difficulty | Beginner to Intermediate |
Sets & Reps (By Goal)
- Beginner core control: 2–3 sets × 8–10 reps with slow, clean movement
- Ab strength and endurance: 3–4 sets × 12–15 reps with 30–60 seconds rest
- Core activation warm-up: 1–2 sets × 8–12 reps before a main workout
- Controlled tempo focus: 3 sets × 8–12 reps using a 2-second lift and 3-second lowering phase
Progression rule: Add reps first, then increase the pause at the top. Do not progress by swinging the legs or rushing the crunch.
Setup / Starting Position
- Lie on your back: Use a flat surface or exercise mat for comfort.
- Lift the legs: Bend the knees and bring the thighs above the hips or slightly toward the torso.
- Open the knees slightly: Keep the knees apart enough to create space for the arms to reach through.
- Set the arms: Extend both arms forward between the knees with the palms facing inward or down.
- Brace the core: Keep the ribs controlled and avoid arching the lower back excessively.
- Relax the neck: Keep the chin slightly tucked and avoid pulling the head forward.
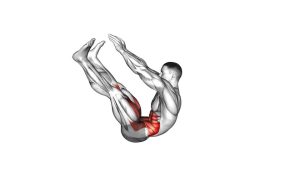
Execution (Step-by-Step)
- Start with control: Keep the knees bent, lifted, and slightly open while your arms point through the gap.
- Exhale and crunch: Curl the shoulders off the floor using your abs, not your neck.
- Reach through the knees: Slide the arms forward between the legs as your upper back lifts.
- Pause at the top: Hold briefly when the abs are fully contracted and the arms are reaching forward.
- Keep the knees stable: Do not let the knees collapse inward or swing outward during the rep.
- Lower slowly: Return the shoulders toward the floor with control while keeping the legs lifted.
- Repeat smoothly: Perform each rep with steady breathing and no bouncing.
Pro Tips & Common Mistakes
- Reach forward, not upward: The arms should travel through the knees to increase abdominal contraction.
- Keep the knees open: The abduction position adds hip stability demand and keeps the exercise unique.
- Avoid neck pulling: Keep the chin gently tucked and let the abs lift the torso.
- Do not swing the legs: The legs should stay controlled while the upper body performs the crunch.
- Control the lowering phase: Dropping quickly removes tension from the abs.
- Keep the lower back stable: Avoid excessive arching as fatigue builds.
- Use a small range if needed: A clean short crunch is better than a large uncontrolled rep.
FAQ
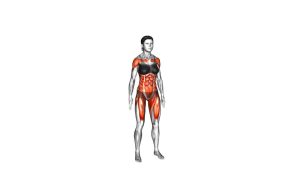
What muscles does the Bent Knee Abduction Crunch with Arms Through work?
It mainly works the rectus abdominis, while also using the hip flexors, obliques, transverse abdominis, and hip stabilizers to keep the legs lifted and knees controlled.
Is this exercise good for beginners?
Yes, it can be beginner-friendly when performed with a small range of motion. Beginners should focus on slow reps, stable knees, and relaxed neck positioning.
Should my feet touch the floor?
In the standard version, the feet stay lifted to increase core demand. If that feels too difficult, you can lightly tap the heels down between reps as a regression.
Why are the knees kept apart?
Keeping the knees slightly abducted creates space for the arms to reach through and adds a hip-stability challenge. The knees should stay controlled instead of collapsing inward.
How do I make this exercise harder?
Use a slower lowering phase, pause longer at the top, increase reps, or hold a small medicine ball between the hands while reaching through the knees.
Recommended Equipment
- Exercise Mat — adds comfort and support for floor-based crunch exercises
- Ab Mat — useful for improving comfort and supporting controlled abdominal training
- Mini Resistance Bands — can be placed above the knees for extra hip-stability work
- Medicine Ball — optional progression for adding light resistance to the reach
- Core Sliders — useful for pairing this exercise with other core stability movements
Tip: Choose equipment that improves comfort and control. Avoid adding resistance until your bodyweight reps are smooth and pain-free.