Bodyweight Step-Up on Step Box: Proper Form, Muscles & Tips
Learn the Bodyweight Step-Up on Step Box for stronger quads, glutes, and balance. Discover proper form, sets by goal, common mistakes, and FAQs.
Bodyweight Step-Up on Step Box
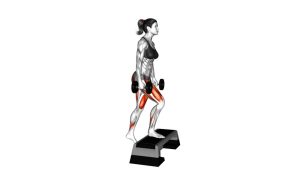
The Bodyweight Step-Up on Step Box helps develop practical leg strength while improving balance and coordination. Because each leg supports most of the bodyweight independently, the movement also challenges unilateral stability. Additionally, the quadriceps and glutes generate the primary force needed to lift the body onto the platform. Meanwhile, the hamstrings, calves, and core stabilizers help maintain controlled movement. For beginners, a low step provides an accessible starting point for learning proper technique. Moreover, the exercise can become progressively more challenging as balance and strength improve. Therefore, focus on smooth repetitions and reliable foot placement before increasing the platform height.
Quick Overview
| Body Part | Legs |
|---|---|
| Primary Muscle | Quadriceps (rectus femoris, vastus lateralis, vastus medialis, vastus intermedius) and gluteus maximus |
| Secondary Muscle | Hamstrings, gluteus medius, gluteus minimus, adductors, gastrocnemius, soleus, and core stabilizers |
| Equipment | Low aerobic step box or stable exercise platform; bodyweight resistance only |
| Difficulty | Beginner (progressively more challenging with increased step height or resistance) |
Sets & Reps (By Goal)
- Strength: Perform 3–4 sets × 6–10 reps per leg. Focus on driving upward through the working foot. Additionally, rest approximately 60–90 seconds between sets to maintain controlled technique.
- Hypertrophy (Muscle Growth): Complete 3–4 sets × 10–15 reps per leg. Use a controlled upward drive and a 2–3-second lowering phase. Furthermore, maintain consistent knee alignment throughout each repetition.
- Muscular Endurance: Perform 2–3 sets × 15–20 reps per leg. Keep a steady rhythm while maintaining proper form. However, avoid increasing your speed if balance begins to deteriorate.
- Balance and Movement Control: Complete 2–3 sets × 8–12 reps per leg. Pause briefly on the platform before stepping down. As a result, you can practice controlled weight transfer and coordination.
- Mobility / Rehabilitation-Style Training: Begin with 1–3 sets × 5–10 comfortable reps per leg. Choose a low step and use optional hand support. However, anyone recovering from an injury should follow an individualized professional plan.
Training Tempo and Progression
For general strength development, step upward smoothly and stabilize briefly at the top. Then lower your body over approximately two to three seconds. As a result, the working leg remains active throughout both phases of the movement.
Beginners should first focus on balance, controlled foot placement, and consistent technique. Once these skills improve, gradually increase repetitions or adjust the platform height. Additionally, experienced exercisers may introduce external resistance when appropriate.
Progression rule: Master the bodyweight movement before increasing difficulty. Then add repetitions, slow the lowering phase, or gradually raise the step height. However, do not increase resistance if your knee alignment or balance becomes inconsistent.
Setup / Starting Position
- Select a stable step box: Choose a low aerobic platform with a wide, non-slip stepping surface. Before starting, confirm that the box does not slide, rock, or tilt.
- Position yourself in front: Stand facing the platform with both feet flat on the floor. Next, position your feet approximately hip-width apart and maintain a comfortable distance.
- Maintain upright posture: Keep your chest comfortably lifted, shoulders relaxed, and spine neutral. Meanwhile, engage your abdominal muscles lightly to support trunk stability.
- Choose the leading leg: Select one foot to begin the movement. Then lift that knee and place the foot securely on the platform.
- Establish full-foot contact: Place the entire working foot onto the box, including the heel. Otherwise, incomplete foot placement can reduce stability during the upward drive.
- Align your lower body: Point the working knee in the same general direction as the toes. Additionally, keep your hips relatively level rather than allowing excessive rotation.
- Prepare the trailing leg: Keep the opposite foot on the floor until the upward movement begins. Finally, allow your arms to remain naturally relaxed beside the body.
Choosing the Correct Step Height
Beginners should start with a relatively low platform. This allows controlled stepping without excessive knee bending or unnecessary trunk compensation. Furthermore, a lower box makes weight transfer easier to manage during the learning stage.
If your hips shift noticeably or your supporting knee collapses inward, reduce the platform height. Similarly, choose a lower surface if you cannot control the downward movement. As a result, you can practice stable technique before progressing to more demanding variations.
Setup tip: First practice several slow repetitions with your preferred leading leg. Afterward, repeat with the opposite leg to encourage balanced lower-body development.
Execution (Step-by-Step)
- Begin in a standing position: Face the step box with both feet on the floor. Before moving, engage your core lightly and relax your shoulders.
- Lift the leading foot: Bend one hip and knee to raise the working foot onto the platform. Then place the entire sole securely on the step before transferring bodyweight.
- Shift your weight forward: Transfer your bodyweight over the elevated foot. Meanwhile, allow a small natural forward lean while keeping your spine neutral.
- Drive through the elevated leg: Push through the midfoot and heel of your working foot. As a result, your knee and hip extend together to lift your body upward.
- Bring the trailing foot onto the box: Lift the opposite foot from the floor as your body rises. Next, position it beside the leading foot on the platform without jumping upward.
- Stand upright at the top: Straighten both legs into a balanced standing position. Additionally, keep your hips level and shoulders relaxed. Unlike a knee-drive variation, both feet remain on the platform.
- Initiate the downward movement: Begin stepping the trailing foot backward toward the floor. Meanwhile, bend the supporting knee and hip to control your descent.
- Lower without dropping: Gently place the trailing foot onto the floor. However, continue controlling your bodyweight through the leg remaining on the platform.
- Return the leading foot: Step your remaining foot down from the elevated surface. Then finish with both feet planted firmly on the floor.
- Repeat with consistent technique: Perform the prescribed repetitions before switching leading legs. Alternatively, alternate sides when appropriate. Above all, maintain the same movement quality on both legs.
Understanding the Upward and Downward Phases
During the upward phase, the quadriceps extend the working knee while the glutes extend the hip. As a result, your body rises onto the platform through coordinated lower-body force. Furthermore, the core helps stabilize your torso as your center of mass shifts upward.
During the downward phase, these same muscle groups help control knee and hip flexion. Therefore, lowering slowly is just as important as producing force during the ascent. In addition, the controlled descent develops coordination under bodyweight resistance.
Throughout the exercise, the hips and core provide additional stability. Although a slight forward lean is natural, excessive leaning can indicate poor control. Consequently, adjust the step height whenever the movement becomes unstable.
Breathing and Movement Rhythm
Exhale naturally as you step upward and inhale during the controlled descent. Meanwhile, keep your breathing relaxed instead of holding your breath unnecessarily.
A practical rhythm involves approximately one to two seconds upward. Next, stabilize briefly at the top before lowering over two to three seconds. However, you should adjust the tempo whenever balance requires additional control. In particular, never rush the downward phase simply to finish a set faster.
Pro Tips & Common Mistakes
- Use an appropriate platform height: Start with a low box that allows smooth and controlled repetitions. Otherwise, an excessively high platform may encourage compensations and poor balance.
- Keep the entire foot supported: Position your working foot securely on the platform. As a result, weight transfers more predictably during the upward and downward phases.
- Avoid jumping from the floor: Generate most of the upward force through the elevated leg. Instead of springing upward, use controlled hip and knee extension.
- Maintain proper knee tracking: Keep your supporting knee aligned with the direction of your toes. In particular, avoid allowing the knee to collapse inward repeatedly.
- Do not rush the descent: Lowering too quickly reduces movement control and may increase your risk of losing balance. Therefore, use a consistent downward tempo.
- Finish standing tall: Bring the second foot onto the platform and extend both legs comfortably. However, avoid exaggerating your lower-back arch at the top.
- Control your hip position: Keep your pelvis relatively level throughout the weight transfer. Otherwise, excessive side-to-side movement may reduce stability.
- Keep your arms natural: Allow small, comfortable arm movements to support balance when necessary. Nevertheless, avoid swinging your arms aggressively to generate momentum.
- Train both legs evenly: Complete a similar number of controlled repetitions with each leading leg. Consequently, both sides receive comparable practice and training volume.
- Progress gradually: Master bodyweight technique before adding resistance or increasing platform height. Furthermore, reduce the difficulty whenever fatigue affects your technique.
How to Improve Step-Up Technique
Practice the movement slowly while concentrating on weight transfer through the leading foot. Additionally, keep your supporting knee stable throughout the upward drive. As your balance improves, aim for consistent repetitions without excessive trunk movement.
If balance remains challenging, position the platform near a secure support. Then use light hand assistance while practicing controlled stepping. Eventually, reduce assistance as coordination and confidence improve.
Common Errors That Limit Results
The most frequent mistakes include incomplete foot placement, excessive push-off from the trailing leg, and uncontrolled lowering. Furthermore, a platform that is too high may encourage unnecessary hip rotation and excessive forward leaning.
To correct these problems, decrease the step height and slow your repetitions. In addition, check that your entire working foot remains supported. Above all, prioritize repeatable movement quality rather than completing extra repetitions with poor technique.
FAQ
Muscles Worked and Exercise Technique
What muscles does the Bodyweight Step-Up on Step Box work?
The exercise primarily targets the quadriceps and gluteus maximus. Together, these muscles extend the knee and hip during the upward movement. Additionally, the hamstrings, calves, and hip stabilizers contribute to balance and movement control.
Because the exercise challenges one leg during much of the repetition, it also develops unilateral coordination. Furthermore, the core muscles help stabilize your torso as your bodyweight shifts onto the elevated foot.
How is a standard step-up different from a step-up with knee drive?
In a standard step-up, the trailing foot joins the leading foot on the platform. Consequently, both feet support the body at the top.
By contrast, a step-up with knee drive lifts the trailing knee upward instead of placing that foot on the box. As a result, the knee-drive variation creates an additional single-leg balance challenge.
The demonstrated exercise uses the standard two-foot top position. Therefore, it should not be classified as a step-up with knee drive.
Step Height, Balance, and Safety
Is the Bodyweight Step-Up on Step Box suitable for beginners?
Yes. A low, stable platform makes the exercise accessible to many beginners. Furthermore, bodyweight resistance allows learners to focus on technique before adding external loads.
Start with approximately six to eight controlled repetitions per leg. Additionally, use a comfortable platform height and adequate rest. If balance becomes difficult, reduce the height or use light hand support.
However, people with significant balance limitations or existing injuries may require individualized guidance.
How high should the step box be for this exercise?
The ideal height depends on your mobility, strength, leg length, and balance. Generally, beginners benefit from starting with a lower platform.
Choose a height that allows secure full-foot placement. Additionally, your working knee should remain controlled during the upward and downward phases.
If the movement becomes unstable, decrease the step height. Consequently, you can improve your technique before increasing difficulty.
Why do I lose balance during bodyweight step-ups?
Balance problems may result from an unstable platform, incomplete foot placement, or excessive stepping speed. Furthermore, insufficient hip and ankle control can make weight transfer more difficult.
A platform that is too high may also encourage side-to-side body movement. As a result, the working leg may struggle to maintain alignment.
To improve balance, lower the platform and slow each repetition. Additionally, practice steady weight transfer before progressing to a higher step.
Training Frequency and Progression
How often should I perform step-ups?
Many people can include bodyweight step-ups in lower-body training two or three times per week. However, the ideal frequency depends on experience, recovery, and total exercise volume.
For beginners, two weekly sessions may provide a manageable starting point. Meanwhile, lighter step-up repetitions can also be used during warm-ups.
As strength improves, gradually adjust your training volume. Nevertheless, allow adequate recovery between demanding leg workouts.
Are step-ups better for quadriceps or glutes?
Both muscle groups contribute significantly. The quadriceps extend the knee, while the gluteus maximus extends the hip during the ascent.
A relatively upright torso and lower platform provide a practical way to practice controlled knee extension. Meanwhile, a greater hip bend may increase the contribution of the gluteal muscles.
However, individual muscle emphasis varies with anatomy, step height, and technique. Therefore, prioritize stable movement rather than exaggerating a particular posture.
Can I add dumbbells or a weighted vest to step-ups?
Yes. Once bodyweight repetitions become controlled, additional resistance may increase training difficulty. For example, you can hold light dumbbells or wear an appropriately fitted weighted vest.
However, external resistance increases the demands on your hips, knees, and balance system. Therefore, introduce additional weight gradually.
If knee tracking or descent control becomes inconsistent, reduce the load. Above all, maintain proper technique before attempting heavier resistance.
Can I perform step-ups if I have knee pain?
Suitability depends on the cause and severity of your symptoms. Although some people tolerate low step-ups well, others may require alternative exercises.
If stepping causes discomfort, avoid increasing platform height or resistance. Additionally, stop if pain becomes sharp, progressively worsens, or changes your normal movement pattern.
For persistent knee pain, swelling, instability, or recent injury, consult a qualified healthcare professional. As a result, your training approach can better reflect your individual needs.
Recommended Equipment
- Adjustable Aerobic Step Platform — the primary equipment for this exercise. It provides a stable elevated stepping surface. Additionally, adjustable risers allow gradual changes in height as strength and coordination improve.
- Non-Slip Cross-Training Shoes — supportive footwear with reliable traction for repeated stepping movements. Furthermore, a secure shoe fit can help maintain stable foot contact during controlled descents.
- Mini Resistance Loop Bands — useful for complementary glute activation and hip-stability exercises. For example, mini bands can be used during separate lateral walks or hip-abduction warm-up drills.
- Adjustable Dumbbells — an optional progression tool for experienced exercisers. Once bodyweight technique is reliable, gradually increasing resistance can make step-ups more challenging.
- Adjustable Weighted Vest — provides optional external resistance while keeping both hands available. However, start with light loading and maintain consistent balance before increasing the weight.
Equipment tip: The step box is the only equipment required for the demonstrated bodyweight exercise. However, suitable footwear and a stable training surface can support safer practice. Additionally, resistance equipment is optional and should only be introduced after mastering the original movement.