Lying Raised Shoulders Windshield Wiper: Core Form, Sets, Tips & FAQ
Learn the Lying Raised Shoulders Windshield Wiper to train obliques, abs, and rotational core control with proper form, sets, tips, and equipment.
Lying Raised Shoulders Windshield Wiper
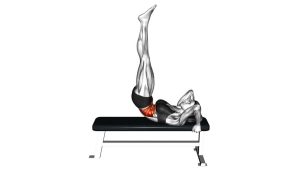
This exercise works best when every rep is slow, smooth, and deliberate. The arms help stabilize the body, but the movement should come from the core, not from momentum. Keep your legs long, your shoulders slightly raised, and your breathing steady as you guide the legs from one side to the other.
Quick Overview
| Body Part | Core |
|---|---|
| Primary Muscle | Obliques |
| Secondary Muscle | Rectus abdominis, transverse abdominis, hip flexors, lower abs |
| Equipment | No equipment required; optional exercise mat |
| Difficulty | Intermediate to advanced |
Sets & Reps (By Goal)
- Core control: 2–3 sets × 6–8 reps per side with a slow tempo.
- Oblique strength: 3–4 sets × 8–10 reps per side with controlled range.
- Muscle endurance: 2–3 sets × 10–14 total reps, keeping tension constant.
- Advanced core finisher: 2–3 sets × 30–45 seconds with strict form.
Progression rule: Increase range of motion only when you can keep your shoulders raised, legs straight, and lower back controlled throughout the full rep.
Setup / Starting Position
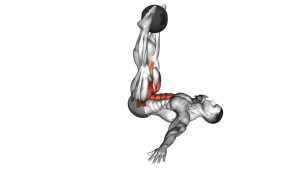
- Lie on your back: Place your body flat on the floor or on an exercise mat.
- Extend your arms: Reach both arms out to the sides in a T-shape with palms pressing lightly into the floor.
- Raise your legs: Lift both legs upward and keep them as straight as possible.
- Lift your shoulders: Slightly raise the shoulders and upper back to increase abdominal tension.
- Brace your core: Pull the ribs down, tighten the abs, and avoid letting the lower back arch.
If straight legs feel too difficult, slightly bend the knees or reduce how far the legs travel from side to side.
Execution (Step-by-Step)
- Start tall with the legs: Keep both legs lifted above the hips and maintain a strong abdominal brace.
- Rotate to one side: Slowly lower both legs toward one side while keeping them together.
- Control the hips: Allow the hips to rotate slightly, but keep the upper back stable and the shoulders lifted.
- Pause before losing control: Stop before the lower back arches or the legs fall heavily.
- Return to center: Use your obliques to pull the legs back to the starting position.
- Repeat to the other side: Move with the same speed, range, and control on the opposite side.
Pro Tips & Common Mistakes
- Keep the shoulders raised: This keeps the abs active and prevents the movement from becoming a passive leg drop.
- Do not rush: Move slowly to make the obliques control the rotation instead of using momentum.
- Keep the legs together: Separating the legs reduces tension and makes control harder to measure.
- Avoid excessive range: You do not need to touch the floor. Stop where your core can still control the movement.
- Press the arms lightly: Use the arms for balance, not to force the legs back up.
- Control the lower back: If the spine arches, bend the knees or perform a smaller rotation.
- Breathe with control: Exhale as you bring the legs back toward the center.
FAQ
What muscles does the Lying Raised Shoulders Windshield Wiper work?
It mainly targets the obliques. It also trains the rectus abdominis, transverse abdominis, lower abs, and hip flexors because the body must stabilize while the legs rotate from side to side.
Is this exercise beginner-friendly?
This version is better for intermediate to advanced users because the legs stay raised and the shoulders remain lifted. Beginners can modify it by bending the knees, reducing the range, or keeping the shoulders lower.
Should my legs touch the floor?
No. Touching the floor is not required. Stop before your back arches or your legs drop out of control. Controlled range is safer and more effective than forcing maximum depth.
Why are the shoulders raised during this exercise?
Raising the shoulders increases abdominal tension and makes the exercise more demanding. It helps prevent the core from relaxing while the legs rotate.
What is the most common mistake?
The most common mistake is swinging the legs too quickly. This reduces core tension and places more stress on the lower back. Keep every rep slow and controlled.
Recommended Equipment (Optional)
- Exercise Mat — adds comfort and support for floor-based core training.
- Thick Yoga Mat — useful if your spine or hips need extra cushioning during lying exercises.
- Adjustable Ankle Weights — an advanced progression tool once bodyweight control is excellent.
- Core Sliders — helpful for adding other core stability and anti-rotation exercises.
- Ab Wheel — a strong companion tool for building anterior core strength and trunk control.
Tip: Add equipment only after you can perform the movement with smooth control, stable breathing, and no lower-back discomfort.