Lying Toe Touch: Proper Form, Core Benefits, Sets, Tips & FAQ
Learn the Lying Toe Touch to target your abs with controlled crunch form, proper setup, reps by goal, common mistakes, FAQs, and equipment tips.
Lying Toe Touch
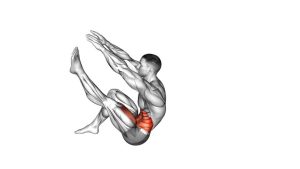
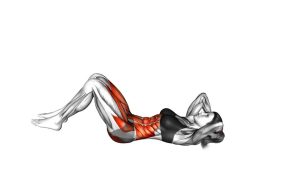
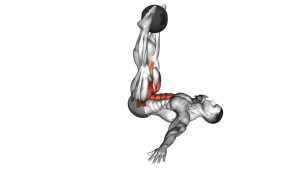
This exercise works best when the movement comes from the abdominals, not from arm momentum. First, keep the legs vertical and stable. Then, lift the head, shoulders, and upper back as your hands reach toward the toes. As a result, the upper abs work hard through a short but focused range of motion. Additionally, the lower abs and hip flexors help maintain leg position, especially when the legs stay straight throughout the set.
Because the Lying Toe Touch uses a compact crunch pattern, every repetition should look clean and controlled. If the legs start dropping, the neck starts pulling forward, or the lower back arches aggressively, reduce the range of motion. Moreover, move slower rather than higher when your form begins to break down.
Quick Overview
| Body Part | Core |
|---|---|
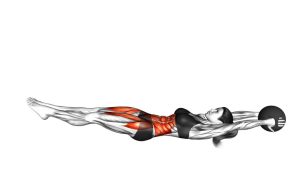
| Primary Muscle | Rectus abdominis, especially the upper abdominal region |
| Secondary Muscle | Lower abdominals, hip flexors, deep core stabilizers, and obliques for control |
| Equipment | No equipment required; optional exercise mat for comfort |
| Difficulty | Beginner to Intermediate, depending on leg control and crunch height |
Sets & Reps (By Goal)
- Beginner core control: 2–3 sets × 8–12 reps with a slow reach and controlled return.
- Ab strength and endurance: 3–4 sets × 12–20 reps while keeping the legs vertical and steady.
- Core finisher: 2–3 sets × 20–30 seconds of smooth continuous reps without swinging.
- Tempo focus: 3 sets × 8–10 reps using 2 seconds up, 1 second squeeze, and 3 seconds down.
Progression rule: Add reps only when you can keep your legs still, your neck relaxed, and your lower back controlled. After that, progress by slowing the lowering phase or adding a brief squeeze at the top.
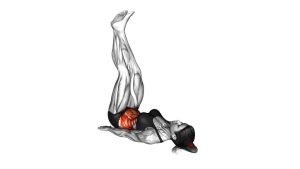
Setup / Starting Position
- Lie on your back: Start flat on the floor or on an exercise mat with your body aligned from head to hips.
- Raise your legs: Lift both legs straight upward until they are close to vertical. Keep the knees as straight as comfortably possible.
- Reach your arms upward: Extend both arms toward your feet so your hands are already aiming toward the toes.
- Set your core: Gently brace your abs before lifting. This helps keep the lower back from arching excessively.
- Relax your neck: Keep the chin slightly tucked and avoid pulling the head forward with tension.
If straight legs feel too difficult, slightly bend the knees while keeping the thighs mostly vertical. However, avoid turning the movement into a leg swing.
Execution (Step-by-Step)
- Begin from the floor: Keep your legs raised and your arms reaching upward toward your toes.
- Curl the upper body: Lift your head, shoulders, and upper back off the floor by contracting your abs.
- Reach toward the toes: Move your hands upward in a straight reaching path, aiming toward your feet without forcing the neck forward.
- Squeeze at the top: Pause briefly when your hands reach the toes or come close to them. At this point, your abs should feel strongly engaged.
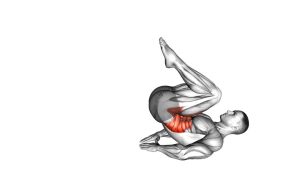
- Lower with control: Slowly return your upper back toward the floor while keeping the legs vertical and steady.
- Repeat cleanly: Start the next rep only after you regain control. Therefore, avoid bouncing from the floor.
Pro Tips & Common Mistakes
- Reach up, not forward: Think about lifting your ribs toward your hips while your hands travel toward the toes.
- Keep the legs steady: The video shows the legs staying vertical, so avoid using leg movement to create momentum.
- Control the lowering phase: Lower slowly because the eccentric phase builds better core control.
- Do not yank the neck: Although the head lifts, the abs should create the movement. Keep the neck relaxed and long.
- Avoid bouncing: Each rep should start from control, not from a rebound off the floor.
- Use a smaller range if needed: If you cannot reach the toes, reach toward the shins while keeping the same crunch pattern.
- Do not let the lower back arch hard: Brace gently before each rep and keep the movement focused through the upper trunk.
- Breathe with the rep: Exhale as you reach upward, then inhale as you lower back down.
FAQ
What muscles does the Lying Toe Touch work?
The Lying Toe Touch mainly works the rectus abdominis, especially during the crunching action. Additionally, the lower abs and hip flexors help keep the legs raised and steady.
Is the Lying Toe Touch good for beginners?
Yes, it can be beginner-friendly when performed with a small range of motion. However, beginners should focus on control first. If reaching the toes is too difficult, reaching toward the shins is a better starting option.
Should my legs move during the exercise?
No. Based on the visible exercise pattern, the legs should remain raised and stable while the upper body curls toward the toes. If your legs swing, slow the movement and brace your core before each rep.
Why do I feel this in my neck?
Neck tension usually happens when you lead with the head instead of the abs. To fix this, keep the chin gently tucked, look toward your feet, and lift through your upper back instead of pulling the head forward.
Can I do Lying Toe Touches every day?
You can practice them often if volume stays moderate and your recovery is good. Still, for stronger progress, combine them with other core movements and allow rest when your abs feel sore or your form declines.
Recommended Equipment (Optional)
- Exercise Mat — adds cushioning for the spine, shoulders, and hips during floor-based ab work.
- Thick Yoga Mat — useful if a standard mat feels too thin for repeated crunch movements.
- Light Ankle Weights — optional progression for advanced users who can keep the legs stable without lower-back strain.
- Small Pilates Ball — can be used for other core drills and controlled ab training variations.
- Core Sliders — helpful for pairing toe touches with other bodyweight core exercises.
Tip: Equipment is optional for this exercise. However, a comfortable mat can improve consistency because it makes floor contact easier on the back.