Standing Obliques Rotation: Form, Benefits, Sets, Tips & FAQ
Learn Standing Obliques Rotation for oblique activation, core control, and torso mobility. Includes form steps, sets, mistakes, FAQs, and gear.
Standing Obliques Rotation
This exercise is ideal for beginners, warm-ups, core activation circuits, and mobility sessions because it does not require equipment and can be performed almost anywhere. The goal is not to twist as far as possible. The goal is to rotate with control while keeping the lower body stable, the spine tall, and the core lightly braced.
Quick Overview
| Body Part | Core |
|---|---|
| Primary Muscle | Obliques |
| Secondary Muscle | Rectus abdominis, transverse abdominis, spinal rotators, hip stabilizers |
| Equipment | None |
| Difficulty | Beginner |
Sets & Reps (By Goal)
- Core warm-up: 2–3 sets × 20–30 total rotations with a smooth rhythm.
- Oblique activation: 3–4 sets × 12–20 reps per side with a controlled pause at each side.
- Mobility routine: 2–3 sets × 30–45 seconds at an easy, relaxed pace.
- Beginner conditioning: 2–4 rounds × 30 seconds, resting 30–45 seconds between rounds.
Progression rule: First improve control, posture, and range quality. After that, you may increase time, reps, or add light resistance such as a resistance band or medicine ball.
Setup / Starting Position
- Stand tall: Place your feet about shoulder-width apart with your weight balanced evenly.
- Soften the knees: Keep a slight bend in the knees to avoid locking the lower body rigidly.
- Brace lightly: Engage your core as if preparing for a gentle cough, without holding your breath.
- Position the arms: Keep your hands together or arms bent in front of the chest.
- Set the posture: Keep your chest lifted, shoulders relaxed, and head aligned with your torso.
Your hips should stay mostly facing forward. A small amount of natural movement is acceptable, but the main rotation should come from the torso.
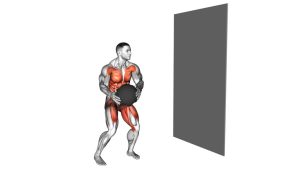
Execution (Step-by-Step)
- Start from center: Stand tall with your arms in front of your torso and your core lightly engaged.
- Rotate to one side: Turn your shoulders and rib cage to the side while keeping your hips mostly forward.
- Control the end range: Stop when you feel a comfortable stretch and oblique engagement, not spinal strain.
- Return to center: Bring your torso back to the starting position with control.
- Rotate to the opposite side: Repeat the same motion in the other direction.
- Continue alternating: Move side to side smoothly while keeping your posture tall and your breathing relaxed.
Pro Tips & Common Mistakes
- Keep the movement controlled: Fast twisting can reduce core engagement and increase lower-back stress.
- Avoid over-rotating: Stop at a comfortable range instead of forcing a deeper twist.
- Do not swing the arms: Your torso should drive the rotation, not arm momentum.
- Keep the hips stable: Try to keep your pelvis facing forward to place more emphasis on the obliques.
- Stay tall: Avoid rounding the shoulders or collapsing through the chest.
- Breathe naturally: Exhale gently as you rotate and inhale as you return through center.
- Use it as a warm-up: This exercise works well before ab workouts, sports training, or full-body sessions.
FAQ
What muscles does the Standing Obliques Rotation work?
It primarily works the internal and external obliques. It also involves the transverse abdominis, rectus abdominis, spinal rotators, and hip stabilizers to help control the movement.
Is Standing Obliques Rotation good for beginners?
Yes. It is beginner-friendly because it uses bodyweight only and has a simple movement pattern. Beginners should start slowly and focus on posture, control, and a comfortable range of motion.
Should my hips move during the rotation?
A small amount of natural hip movement may happen, but the hips should not lead the exercise. For better oblique activation, keep the pelvis mostly forward and rotate mainly through the torso.
Can this exercise reduce waist fat?
It can strengthen and activate the obliques, but it does not directly burn fat from one specific area. For fat loss, combine core training with strength training, cardio, nutrition control, and consistent activity.
Can I add weight to Standing Obliques Rotation?
Yes, but only after you can perform the bodyweight version with excellent control. Start with light resistance such as a medicine ball, light dumbbell, or resistance band. Avoid heavy twisting loads if your lower back is sensitive.
Recommended Equipment
- Exercise Mat — useful for core warm-ups, floor ab work, stretching, and mobility sessions.
- Medicine Ball — helpful for progressing rotational core drills once bodyweight control is mastered.
- Resistance Bands Set — excellent for adding light rotational resistance and anti-rotation core training.
- Light Dumbbells Set — can be used carefully for loaded standing torso rotations and core circuits.
- Adjustable Kettlebell — useful for advanced core, oblique, and full-body rotational strength exercises.
Tip: Add resistance only when the movement stays smooth, pain-free, and controlled. For most beginners, the bodyweight version is enough to learn proper rotation mechanics.